
Lesson 6: Relief Grooves, Patterns & Compliance
What You Will Learn
- Why groove size, depth, and pattern matter
- How pitch layer thickness changes how soft or stiff the lap feels
- How to pick a pattern for shape control or for a pretty, smooth look
Simple Explanation
Grooves are little channels that let slurry move and air get out, like the treads on a tire. If the grooves are small and the pitch layer is thin, the lap feels stiff and it holds the shape of the part well. If the grooves are bigger and the pitch layer is thick, the lap performs softer making it less stable.
Deeper Explanation
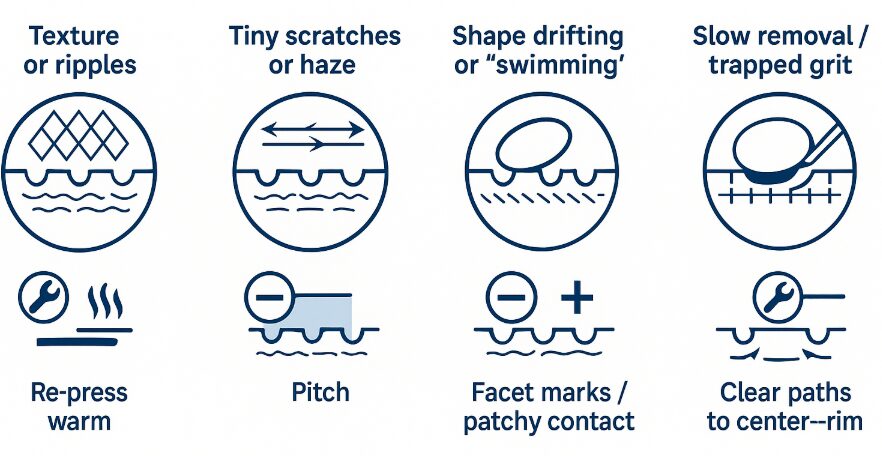 Grooves break the lap into a smaller surface area called facets. Even facets share pressure more evenly. When grooves are too wide or too deep, the lap has less surface area in contact with the lens. Too many grooves and the polisher shape can wander. When grooves are too small or too few, slurry cannot flow, friction increases generating more heat, and the surface can get tiny scratches. Pitch thickness matters too. Thin pitch passes the tool shape to the part, which reduces the technician’s ability to change the radius of the optic. Thick pitch reduces the effect support of the polishing tool making the polisher less stable causing the optic to change radius quickly.
Process Steps
Understand the optical surface specifications required, radius tolerance, figure error, and surface quality. Press the pitch so it contacts the surface of the lens evenly. Pick a pattern that fits your goal and the part size, for example grid, diamond, or annular grooves (concentric rings). Relieve the center of the polisher to remove rotational dead zone. Keep the facets about the same size across the whole lap. During polishing, check the grooves. If they start to close, clean and re-cut them to maintain consistent performance.
Operator Tips
On small tools, less grooves are necessary to maintain pitch surface area and control stability. Larger tools require larger facets to handle larger pressure and friction. Harder pitch maintains radius better, sacrificing surface quality. Softer pitch improves surface quality but changes radius quickly and can affect figure. Grooves should go all the way to the edge for drainage. If the center gets shiny and grooves close there is not enough slurry getting to the center of the polisher, or the supporting tool radius is incorrect.
Common defects & fixes
Texture or little ripples. Use a pattern that breaks up long straight lines, like diamond. Re-press warm so contact evens out. If shape is stable, a little thicker pitch can help smooth. Try softer pitch, less weight, reduce polisher surface area.
Tiny scratches or haze. You may not have enough slurry flow, add more grooves. Open the grooves, clean the slurry, lower pressure and speed, try softer pitch.
Difficult to maintain radius control – The lap is too soft. Make facets bigger. Try harder pitch. Reduce pressure. Reduce speed. Varify supporting tool radius
Facet marks or patchy contact – Facets are uneven. Recut to even sizes, clean the intersections, and reheat an form the polisher to the surface.
Slow removal – make sure grooves are open from center to edge, reopen glazed grooves, and lightly refresh the pitch surface. Check slurry concentration. Increase pressure. Increase speed.